
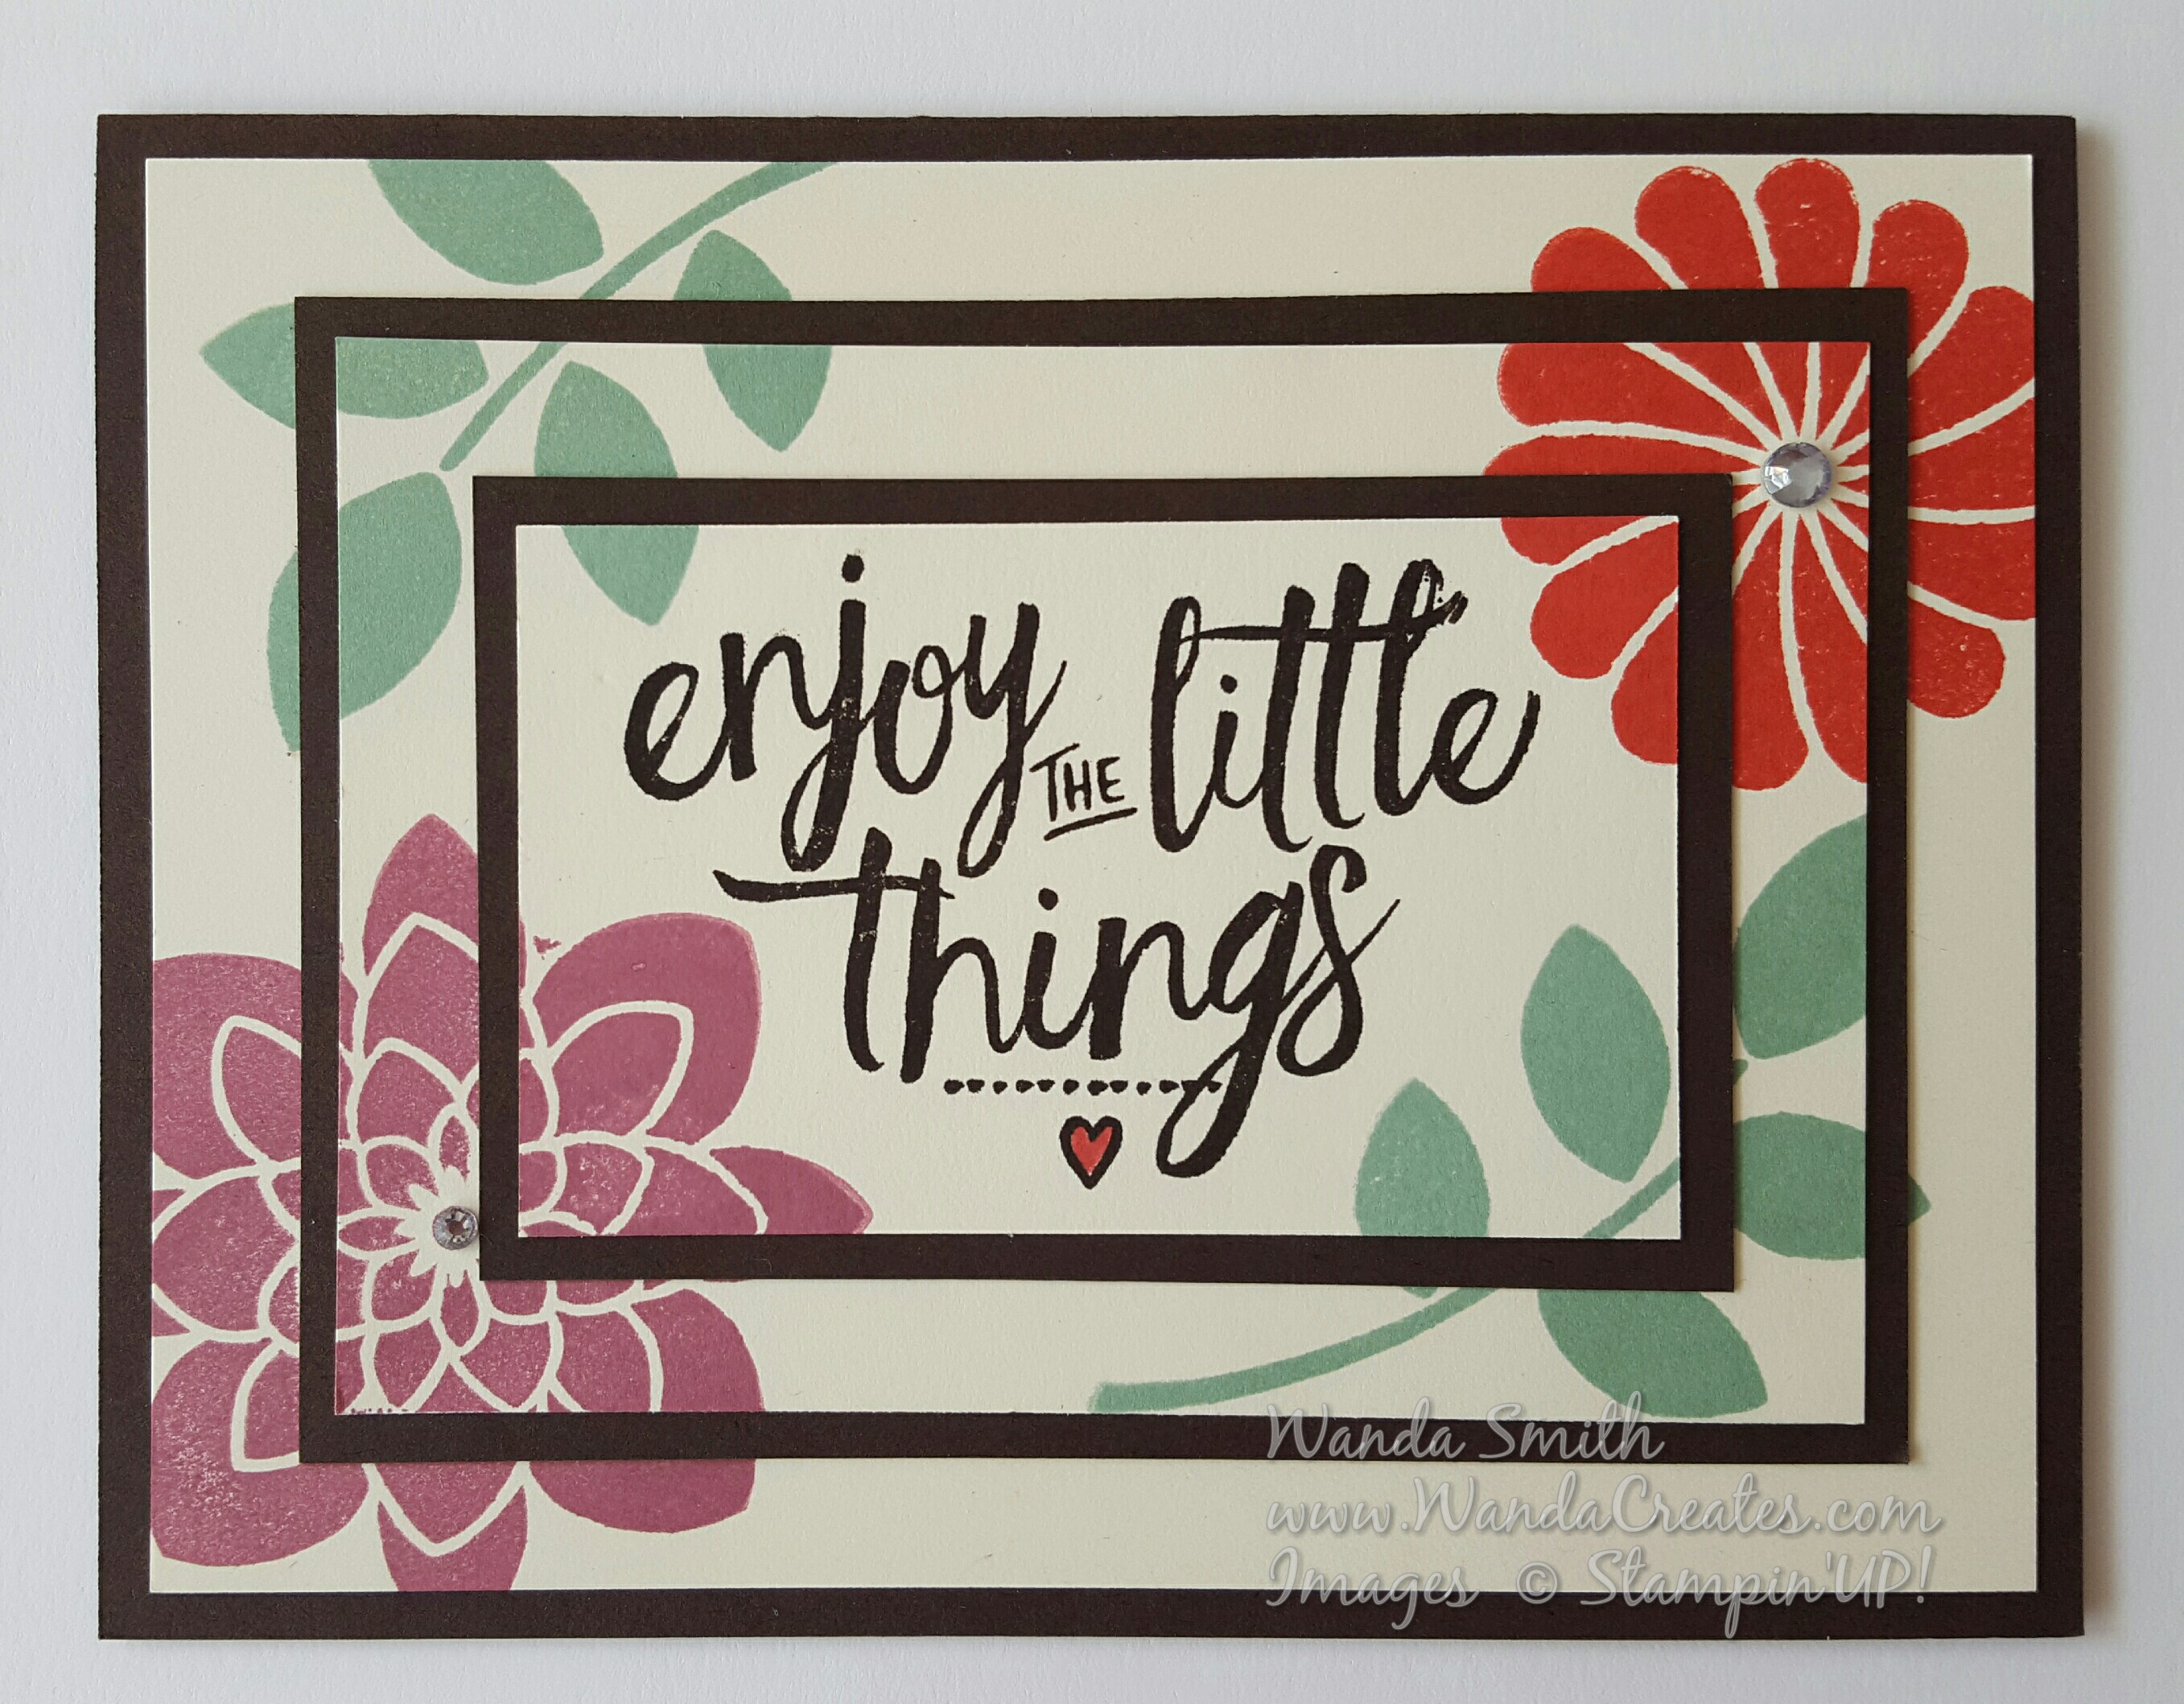
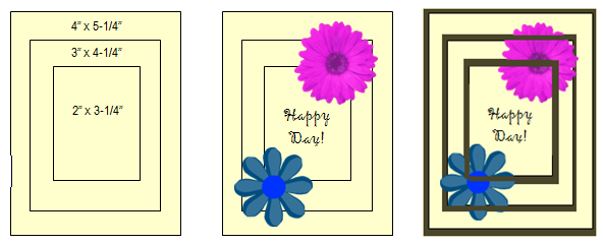
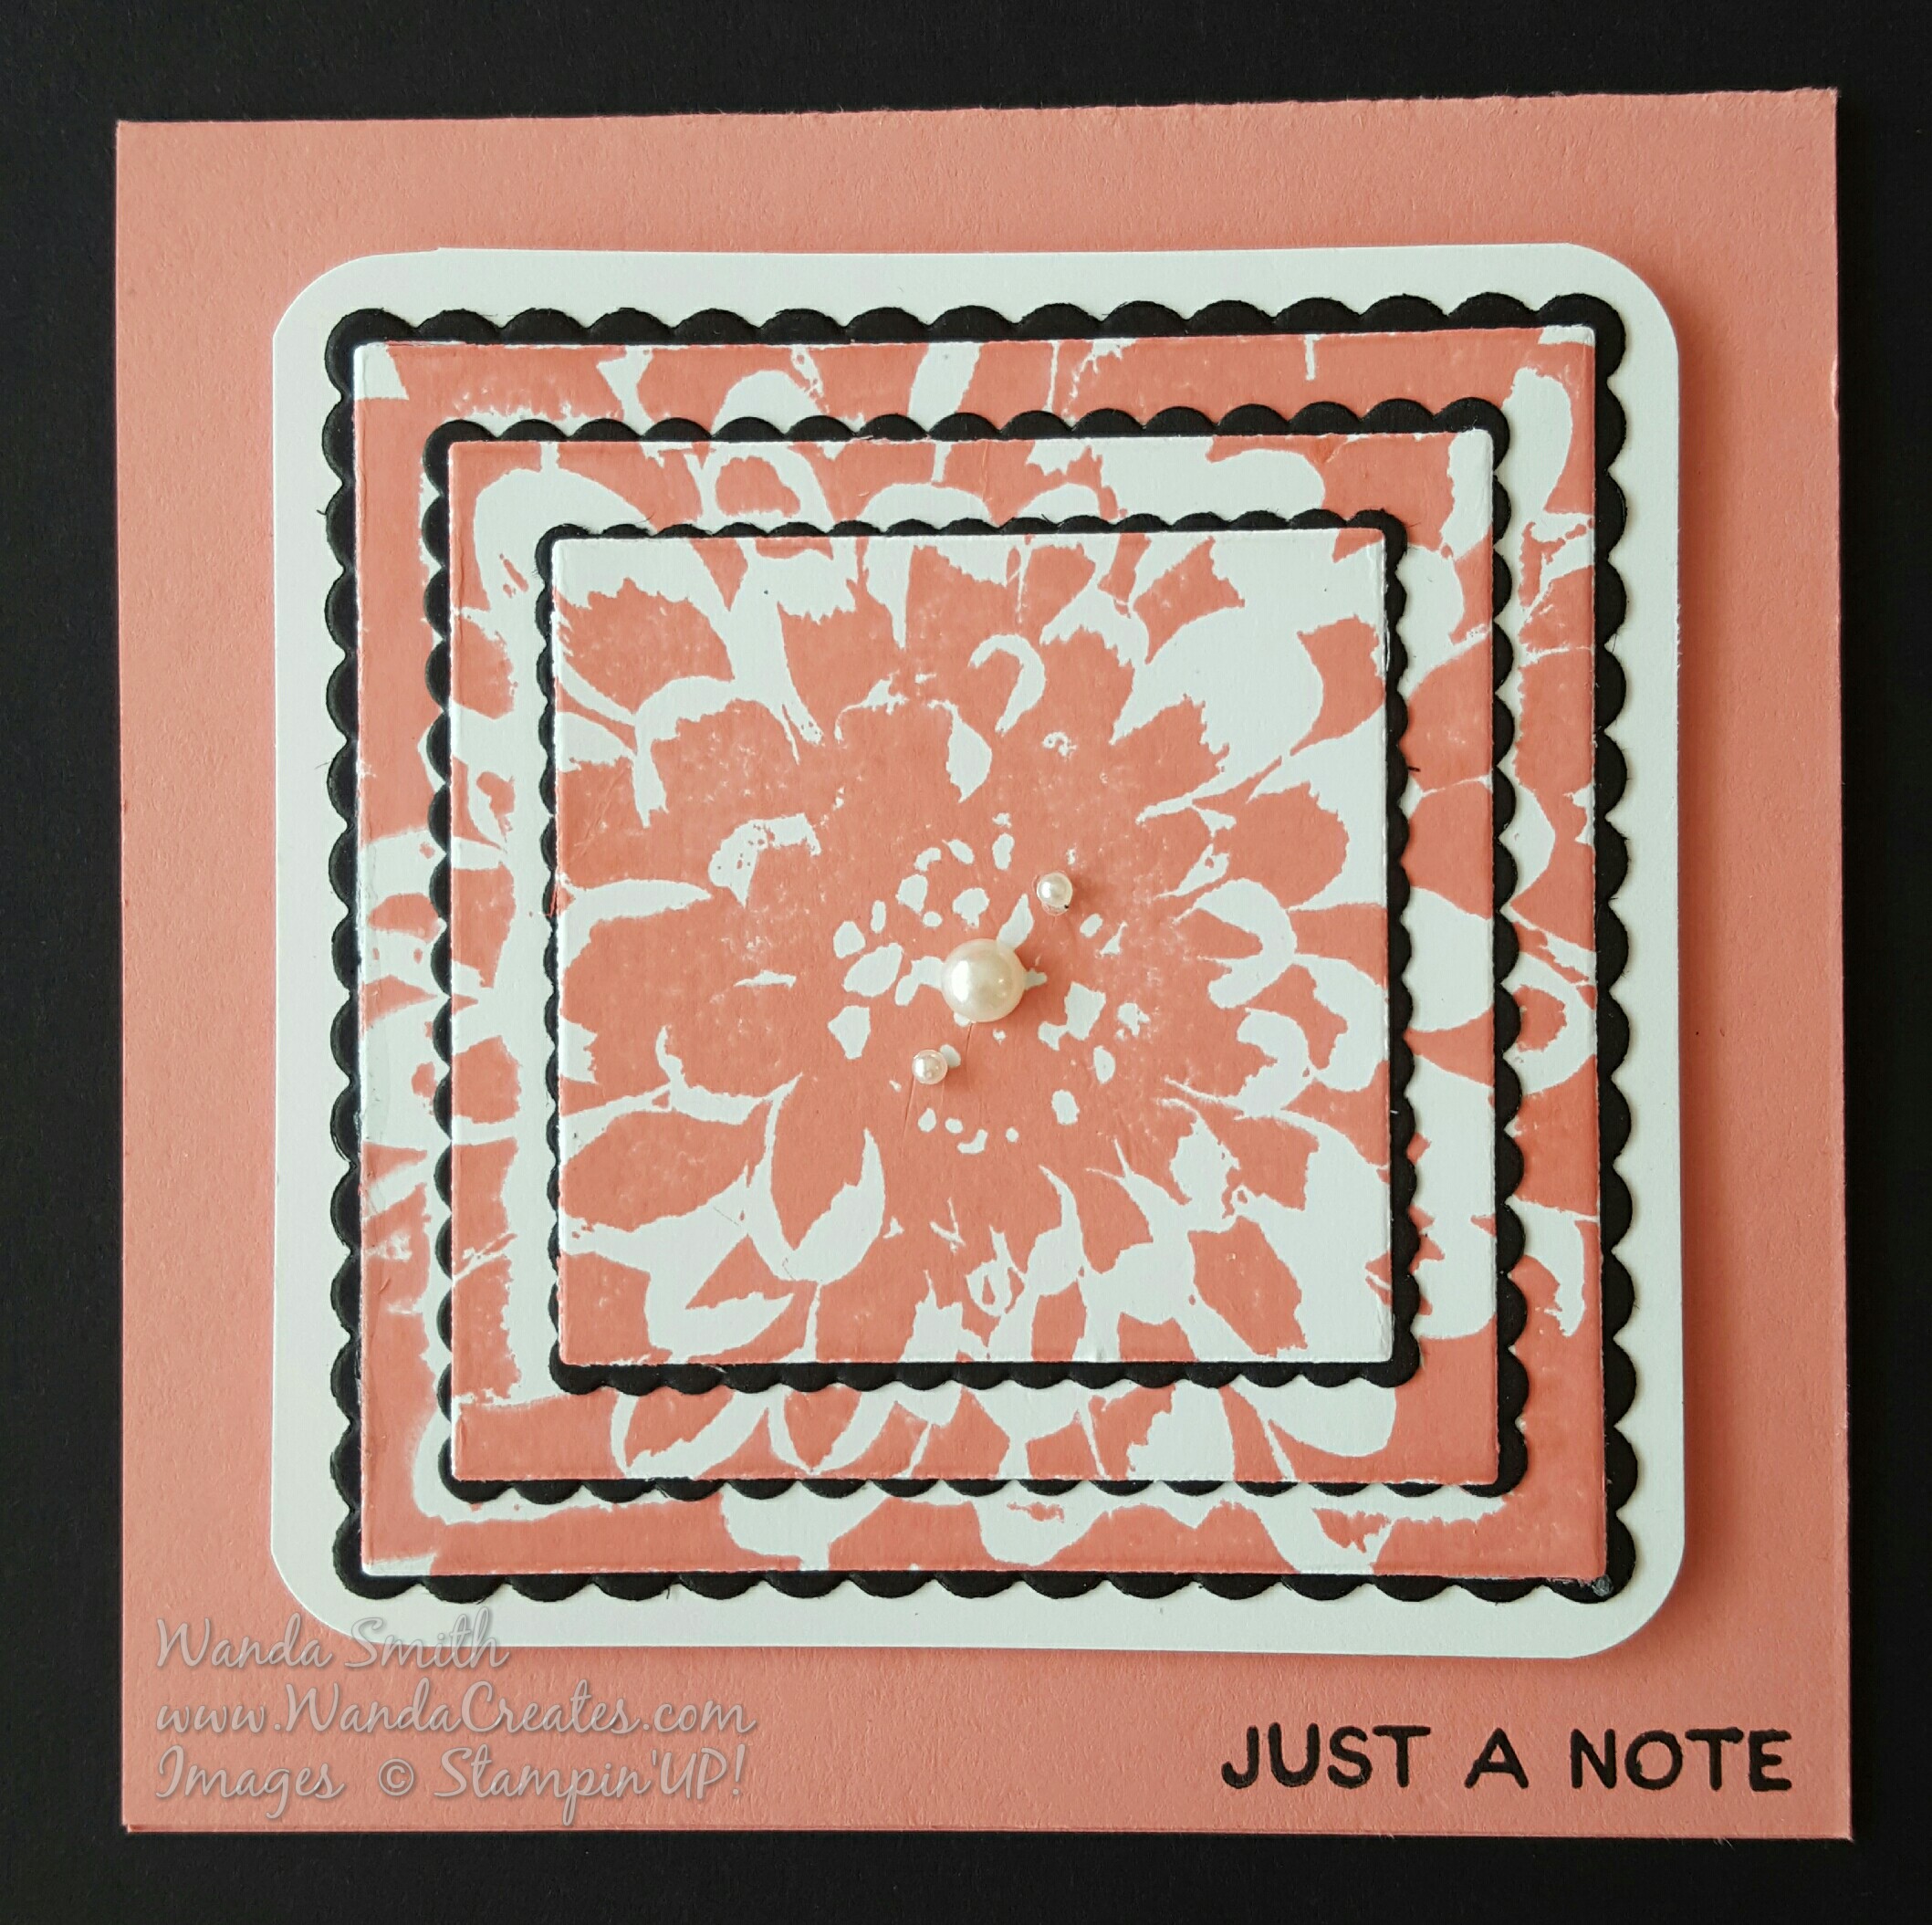
I recently posted two of my Technique Class cards using the Triple Time Stamping Technique and have gotten a lot of requests on how to accomplish this technique. Here are the instructions:
The dimensions are as follows:
Very Vanilla
- 2″ x 3-1/3″
- 3″ x 4-1/4″
- 4″ x 5-1/4″
Early Espresso
- 2-1/4″ x 3-1/2″
- 3-1/4″ x 4’1/2″
- 5-1/2″ x 8-1/2″ (fold in half for card base)
Instructions:
Center and adhere all Very Vanilla pieces with temporary adhesive and stamp greeting and/or images on these layers.
Separate Very Vanilla pieces and start adhering all pieces with permanent glue.
Start with your Early Espresso Card Base (folded in half)
Center and adhere the 4” x 5-1/4” Very Vanilla piece on top
Center and adhere the 3-1/4” x 4-1/2” Early Espresso piece on top
Center and adhere the 3” x 4-1/4” Very Vanilla piece on top
Center and adhere the 2-1/4” x 3-1/2” Early Espresso piece on top
Center and adhere the 2” x 3-1/4” Very Vanilla piece on top to finish
Click HERE to download an instruction page.
Here are a few more samples, the first one was a card I made for a swap in August 2012 and Linda Heller featured it in Stamping School. 

Here are a few more samples I found on Pintrest.

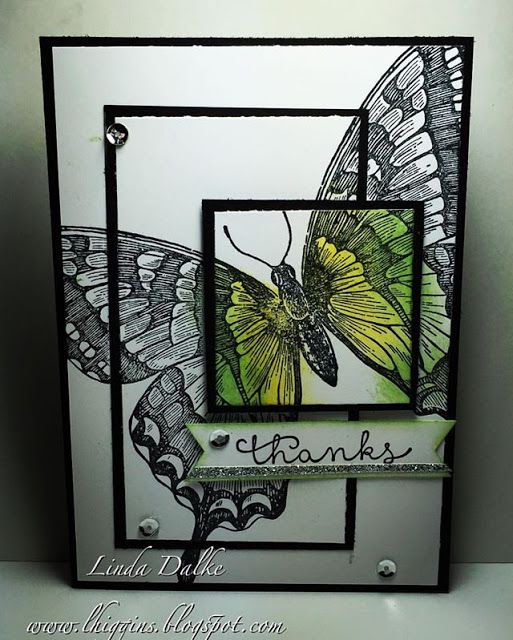
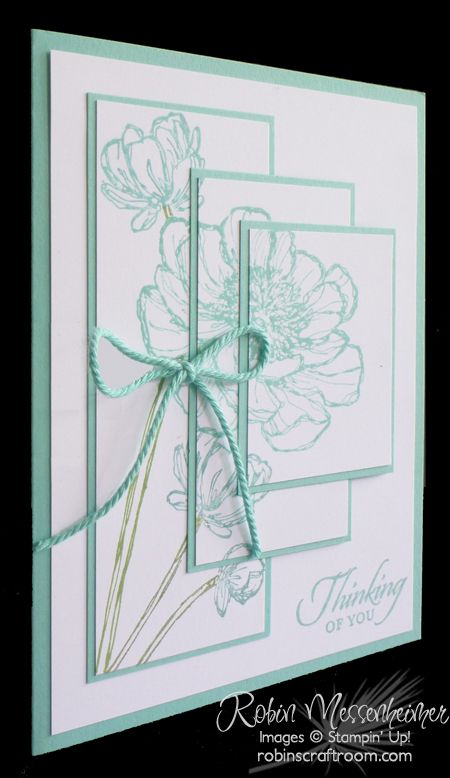


Here’s a triple stamp I have done last year. It’s a great technique but a little difficult ……….. takes a lot of time to do.
Maggie
________________________________